How to Install Sign Letters with Stud Mounts (Drill Method)
Sign Installation has never been easier!
This step-by-step guide for installing signage and lettering using Stud Mounts (threaded rods) will show you just how easy it is. By using our 1:1 mounting templates and included mounting hardware, we make the process simple and painless!
Table of Contents
What You Will Need
- Signage and/or Letters
- Mounting Template (included)
- Stud Mounts/Threaded Rods (included)
- Drill & Drill Bit (3/16")
- Level
- Masking Tape or Painter's Tape
- Tape Measure
- Clear Silicone
Before You Get Started
Make sure your wall is CLEAN and DRY before installing the signage. For this method, the wall must be FLAT and SMOOTH.
NOTE: If installing on Stone or Brick use a 3/16″ Masonry Drill Bit and Hammer Drill.
STEP 1: Plan & Prep Sign Location
If centering the sign, use a tape measure to find and lightly mark the wall’s center point.
If not centering, hold the template up to “preview” placement and choose the ideal location.
Wipe the area with a clean, non-abrasive cloth so the template tape sticks well.

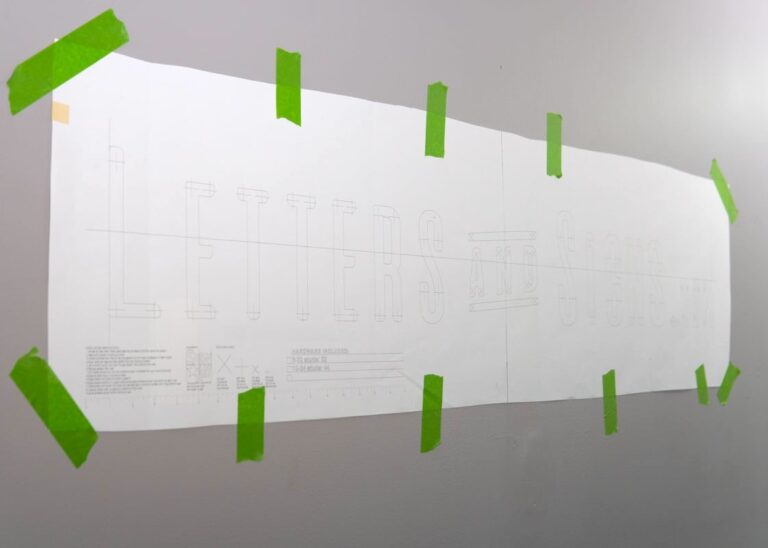
STEP 2: Position The Template
Lightly tape the template to the wall using masking or painter’s tape. Use the template’s center marks/notches (if included) to help align it.
TIP: Dont fully tape down the template yet – you may adjust it in the next step
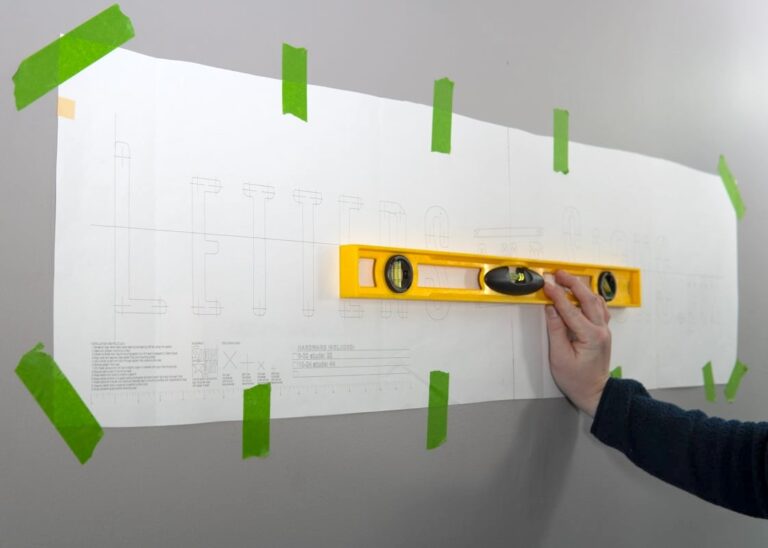
STEP 3: Level Template & Apply More Tape
Ensure the template is level on the wall.
Then apply more tape. Ensure the template is taped tight and flat against the wall.
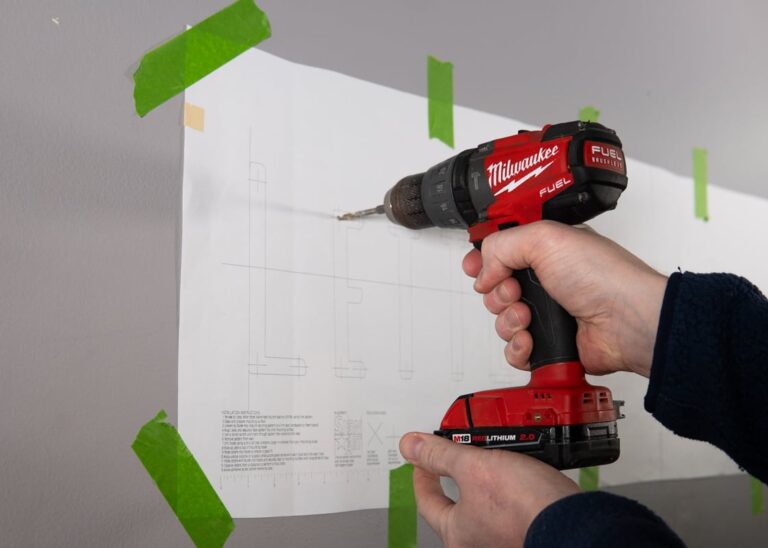
STEP 4: Drill Holes (through template)
Using a drill bit slightly larger than the stud diameter (usually 3/16″ bit), drill straight through the paper template at each stud mark and into the wall.
IMPORTANT:
Keep the drill perpendicular to the wall so the holes are straight and studs slide in easily.
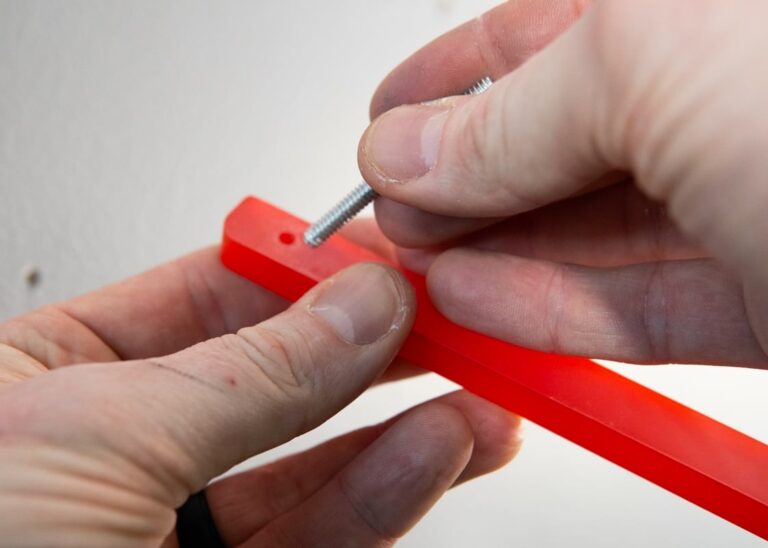
STEP 5: Attach Studs
Hand-Tighten the stud mounts (threaded rods) into the holes on the back of letters. Slide standoffs (if included with your order) over studs.
IMPORTANT: Do not overtighten. Just hand-tighten until the feel secure and not wobbly.
STEP 6: Test Fit a Few Letters
Carefully remove the template and clean dust from the holes (vac/brush works great).
Then do a quick dry run: Place one or two letters onto the wall (no silicone yet) to confirm everything lines up. Adjust any tight holes as needed.

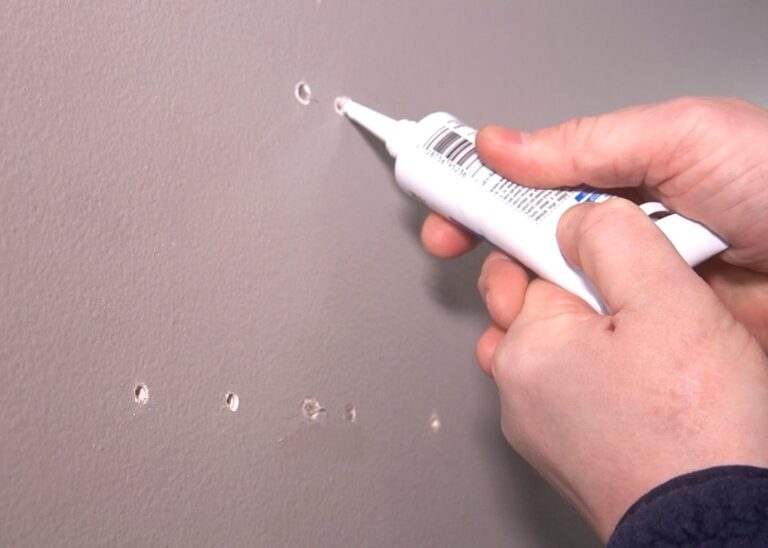
STEP 7: Fill Holes with Silicone
Fill each drilled hole partially with silicone (about 1/3 full is usually enough). You want coverage—not a hole overflowing with sealant.
This helps lock the studs in place and reduces moisture exposure.
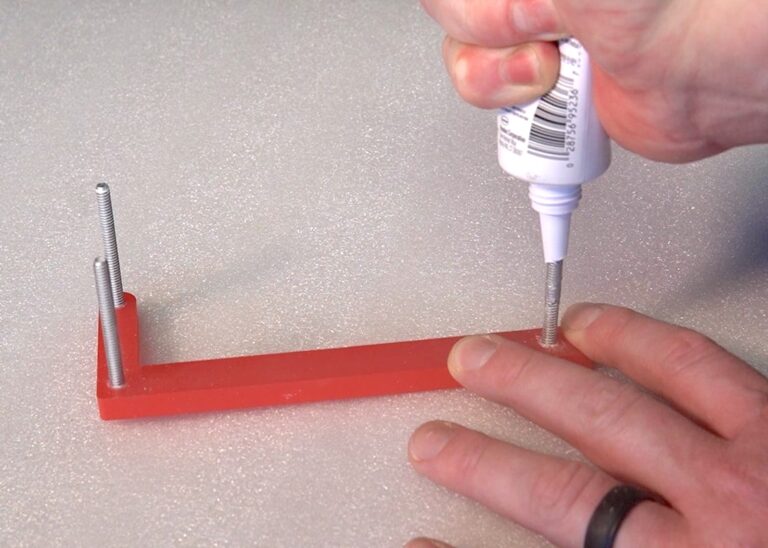
STEP 8: Apply Silicone to Studs
Apply a small dab/light coat of silicone to the tips of the studs (or the portion that will sit inside the wall).
IMPORTANT: Less is more. Too much silicone can squeeze out around the letter edges.
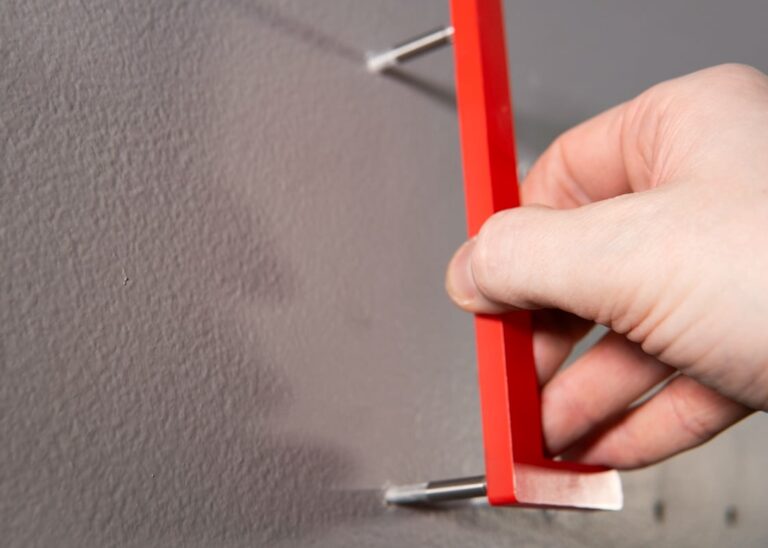
STEP 9: Mount The Letters
Starting with one letter, align the studs with the holes and press the letter straight into place until it sits flush (or until spacers/standoffs touch the wall, if your set uses them).
Repeat for each letter.
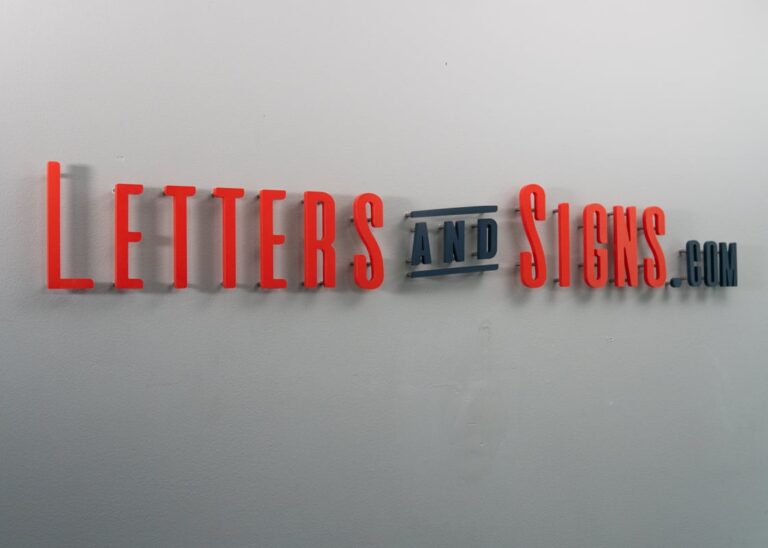
THAT'S IT!
Now take a step back and enjoy you sign.
Do a happy dance, give yourself a pat on the back, pop champagne! Whatever it is – you deserve it!
Common Mistakes & Troubleshooting
Symptom: Holes too tight (studs won’t fit) or too loose (letters wobble).
Fix: If too loose, use silicone/epoxy; if too tight, carefully ream the hole with the same size drill bit or use a drill bit 1/16″ larger.
Symptom: Some letters dont align with the holes that were drilled.
Fix: This is often caused by similar letters being swapped (for example, two “O”s installed in each other’s position) or a letter being rotated/upside down. Before adjusting holes, match each letter to the pattern and confirm the top/bottom orientation.
Symptom: Some letters sit proud; gaps appear.
Fix: Use silicone to fill and stabilize. For very uneven surfaces, consider using pad mounts or spacers to compensate for the uneven surface.
Symptom: Studs stop short; letter won’t sit flush.
Fix: Blow out or vacuum each hole after drilling. Dust can prevent full seating and weaken adhesive bonds.
Symptom: Mounting template wont stick or keeps falling off wall.
Fix: Ensure wall is clean. If its outdoors, try using a gorilla tape or some other stronger tape for better hold.
FAQS
Absolutely! Just request spacers when submitting your order and we can include them for no additional cost. We offer a wide range of spacer sizes (1/2″ to 1-1/2″). This ensures consistent spacing across all your letters.
Use a bit sized for the stud diameter and your method (usually a 3/16″ drill bit). A snug fit can work on some materials; if you want adhesive room, drill slightly larger so silicone/epoxy can grip.
Often yes—especially outdoors, on masonry, or when holes are slightly oversized. Silicone is common for weather resistance; epoxy can be used where a rigid bond is needed. If you’re installing indoors, silicone is not absolutely necessary but still advised for extra adhesion and security.
Deep enough for the stud length plus a little extra room for adhesive (if used). Usually a minimum of 1″ of stud needs to go into the wall for proper hold.
No, you dont need to drill into a wall stud like you would when mounting something heavy, like a TV. And wall anchors are usually not required.
Ready to get started?
Send us an email or fill out a quote form and we’ll get back to you within 1 business day!